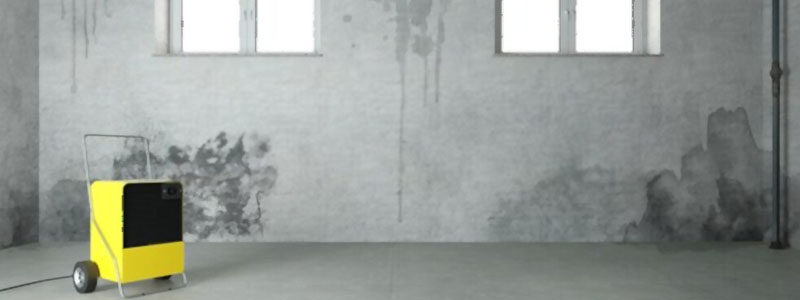

If your basement walls look straight out of a horror movie, you may be itching to give it a makeover. Since a splash of color fixes almost everything, why not paint your walls?
Just in case you’re apprehensive about painting poured concrete basement walls, let’s see how it can be easily done.
If that piqued your interest, you’ll love what we have in store for you.
Let’s cut the chase and get right into it, shall we?
Contents
Painting Poured Concrete Basement Wall: Good or Bad?
Although painting any kind of wall comes with its own hassle, keep a few things in mind while painting poured concrete walls.
While most of us may know it, poured concrete walls are made by pouring concrete in several areas and also curing it in the construction site itself.
This comes with plenty of benefits such as
- Increased density
- Protection against potential fires
- Keep the interior dry
Thus, they’re an excellent choice for basements.
On top of that, they’re also super low maintenance, so you’ll barely face any maintenance cost.
Those were some great benefits, but what about the downsides? Sadly, the concrete walls do come with some lacking. Poured concrete walls don’t include steel rods, and it’s more prone to cracking.
Moreover, this can even compromise the structural integrity of the entire building. Since they need curing, excess heat and cold may disrupt the process and make the wall weak.
5 Steps in painting poured concrete basement walls
Now that we’ve seen the good and the bad side of having poured concrete walls, let’s get to how we can breathe some life into them.
Fret not, all of these steps are pretty simple and we’ll be with you until the end. Let’s go.
Step 0: Grab what you’ll need
First things first! Make a checklist of all the items you’ll need to get started. That way you’ll stay organized and you can plan the whole thing ahead.
Want to hear a fun fact? This is a great way to start filling empty space beneath concrete. In case you aren’t, be assured that it’s worth the effort.
- Dish liquid
- Water
- Sponge
- Stepladder
- Dehumidifier
- Painter’s tape
- Plastic sheet
- Paint roller
- Brush
Step 1: Clean the walls
Before we get into the painting process, you need to clean the walls thoroughly first. That’s because concrete walls are pretty great at hiding dirt.
Due to their rough texture, you really can’t tell when it needs a good wash. So even though it may seem clean, give it a wash before the painting process.
To do this, simply take a bucket and mix some warm water with dish liquid. Mix well until it bubbles up and dip a sponge in it. Other than getting rid of dirt, soap water is also great for making your walls gleam.
Now time to get to work and scrub off the dirt. Although this may initially sound fun, get ready for some sore arms unless you bring in some extra help.
After you’re done, give it a good wipe with a clean damp towel. Don’t forget the hard-to-reach corners which may require a stool or a stepladder.
Step 2: Dehumidify the room
Fair warning, after the room looks squeaky clean, you may want to ditch the painting project. The room will look great, you’ll want to have a drink and call it a day.
However, you’re only a few steps away from a mega transformation. Hence, get a dehumidifier out and remove all moisture from the room.
The idea here is to get a complete dry base to work it. Even the tiniest bit of moisture can make your paint peel in a few days.
Step 3: Prep the area
Once you’ve waited for about a day, it’s now time to cover the floors and apply painters’ tape on the edges of the wall. This will give you a professional result and you’ll also be less likely to make a mess.
Room prep is an essential step even while you’re correcting a horrid stain job, don’t skip it anyway.
Remove all accessories and light furniture from the room. For the heavy stuff, shift them in the middle of the room and use a plastic sheet to protect them.
Step 4: Apply the paint
It’s now showtime. When it comes to painting concrete, look no further than latex paint. This will give you the best finish, which will stay intact for years.
Also, bear in mind that you’ll need to apply a few layers before you get a solid opaque color.
To start painting, paint on the edges of the wall. Take a small brush and precisely fill in the borders.
After that’s done, take a roller and start painting the walls from the middle. Also, make sure that the paint is applied evenly.
Let the first layer dry and then apply a second coat. After that’s dried, carefully remove the painter’s tape and you’ll admire your beautiful paintwork.
If you want some complementary accessories to go with it, some insulation over the floor can be great to start with.
Step 5: Let the area dry
Last but not least, don’t forget to let the area dry. Don’t take the risk of accidentally smudging the paint and having to redo it all over again.
Since paint also releases toxic fumes, make sure you don’t use the room before you’ve aired it out properly.
In order to ensure the room is completely dry, turn on a room fan and keep all the windows open.
Bottom Line
And now it’s time to wrap up. We hope you enjoyed the read and learned something new.
Have any more queries on painting poured concrete basement walls? Then feel free to comment down below. We love to hear your feedback and solve your doubts.
Until then, keep being creative!


Leave a Reply