
Finally got some time to get that new wall done? Well, after choosing to paint before caulking, you might feel like you didn’t take some things into account.
Now, you need to wait for the paint to dry before you start caulking. But you don’t seem to know how long. So, you end up searching “How Soon After Painting Can You Caulk?”.
Well, here’s the catch-
You’ll find a lot of ways to do this. However, it’s important that you know the best way. Or else things might go south in the middle of the process.
We’ve put together something that’ll answer your question of how long you should wait for the paint to dry, along with all the details you need to get the job done.
Moreover, we’ll also tell you how you can make sure the paint dries well and how you can adequately caulk the surface.
Contents
Equipment You’ll Need
Here is some stuff that you’ll need-
| Equipment | Materials |
| Caulk Gun | Caulk |
| Retractable Razor Blade Scraper | Rubbing Alcohol |
| Shop Vacuum | Cotton Rags |
| Blue Painter’s Tape |
How Soon After Painting Can You Caulk?
The proper question here would be:
“How long should I wait for the paint to dry?”
Well, there’s no direct answer to this question. But to summarize, it’ll take around 8 hours for the paint to dry and about 24 hours until you can apply another coat.
But here’s something that you should know:
All this might sound easy here, but when you go out there and try it out, it’s not what you were expecting. So, we’ll explore all of this and more as we move further into the article.
What’ll Happen If Paint Doesn’t Dry Properly?
It’s crucial that you check if your paint has dried properly or not. Otherwise, you’ll face quite a number of problems while trying to apply caulk over the paint.
For starters, your paint might peel off the surface and create a huge mess. You might even end up creating uneven textures or smudges. So, caulking over wet paint is a bad idea.
So, how long does paint take to try dry?
That’s what we’ll be elaborately explaining in our next section.
Factors Behind How Fast Your Paint Will Dry Before Caulking
Different kinds of paint will dry differently. But then again, they might take more or less time depending on the environment around you.
Now, what does that mean?
Well, it means that if the temperature is high, the paint will dry faster, and if it is more humid, the paint will dry slowly. So, we have to work by combining these factors.
Without further ado, let’s move right into it.
Types of Paint
Knowing the type of paint, you’re using is crucial because different kinds will dry differently. So how many kinds of paint are there?
There are 2 types of paint that you’ll find in the market. Namely:
- Latex Paint: This kind of paint usually dries up more quickly. The coat is often no longer wet in an hour and is ready for any type of re-coating within 4 hours.
- Oil Based Paint: This paint, on the contrary, needs somewhere around 6 to 8 hours to dry up entirely and 24 hours before you can apply another coat. In terms of stickiness on the surface, oil-based ones are better as well.
Here are some of our recommended paints that take the least time to dry:
Our Recommended Paints
[amazon box=”B08F7WW71R,B077PKBDYN,B0015GE8DI,B08DHK5BGY” template=”table”]Humidity
Now, let’s talk about the humidity. The more humid your room is, the more time it’ll take to dry.
A paint’s water content will not evaporate appropriately in high humidity, which will increase the period of wetness. So, it’s ideal to paint in a room with 50 Percent Humidity or lower.
Temperature
Moving on, let’s discuss how temperature plays a role here.
For starters, if you’re using latex paint, the optimum temperature would be 50 to 85 degrees Fahrenheit.
On the other hand, if you’re using oil-based paint, the ideal temperature would be 40 to 90 degrees Fahrenheit.
So, it’s ideal if you painted in an air-conditioned room or maybe use an air-cooler to keep it fresh. But, if it’s an outdoor job, skip days that are too hot or too cold.
What’s the problem with that, you ask?
Well, if you paint outside on a hot day, due to rapid evaporation, your paint will be uneven throughout. Moreover, the surface will be as rough as sandpaper.
Similarly, if you paint outdoors on a cold day, your paint will dry slowly. It’s problematic you keep your paint wet for too long, especially outdoors. It might get smudged by any object, even leaves.
So, it’s essential that you paint at the right temperature. Now, let’s talk about ventilation and how it can help your paint dry quickly.
Ventilation
If you try painting in a poorly ventilated room, you can expect your paint to dry slowly. To put it in simpler words, the more air you pass through your room, the faster your paint dries.
The fresh air can help the water content of your paint evaporate faster. You can solve this by installing a temporary fan in the room or using some kind of air conditioning.
Application
Till now, we were talking about how the environment will matter in drying your paint. But now, we’ll talk about how you apply the paint to help the paint dry faster.
For faster drying, use a paint roller to apply every coat of paint evenly, with a consistent finish. Here are some of our recommended paint rollers:
Our Recommended Paint Rollers
[amazon box=”B01MRTEOHI,B07YSXX7SB,B0045PS9S6,B082PQQ3J1″ template=”table”]The Optimal Situation
Lastly, let’s bring it all into one place and find the optimal situation for your paint to dry faster. We have compiled it all down below:
| Type of paint | Temperature (Fahrenheit) | Humidity | Time To Dry (Hours) | Time To Re-coat (Hours) |
|---|---|---|---|---|
| Latex | 50-85 | <50% | 1 | 4 |
| Oil-Based | 40-90 | <50% | 6-8 | 24 |
That’s all you have to follow for drying your paint off fast. Moving on, in the next section, we’ll tell you how you can apply the caulk properly.
How To Caulk Properly Afterwards
Now that the paint has dried, you can apply caulk over the paint and be done with it. So, let us tell you how. But before that, let me ask you a question.
What do you think is important in the application of caulk?
You probably guessed it right. It’s the type of caulk that you’re using. Let’s start by seeing the kinds of caulk and the situations you can use them in.
Types of Caulk
There are 3 kinds of caulk in the market. They are:


Silicone Caulk: This is the caulk used in bathrooms and kitchens because of its waterproof properties. It is smooth, flexible, and perfect for use in humid areas.
Acrylic Latex Caulk: This is the kind that is usually used on surfaces that don’t often get wet. Acrylic latex caulks shrink and crack over time, which leaves it open for water damage.
Polyurethane-based Caulk: This is the paintable kind of caulk, which is also highly elastic and dust repellant. Thanks to its watertight seals, it is used for window seals a lot.
Now, check the surface that you want to apply caulk to and choose the right kind of caulk for it.
Here are some of our recommended brands of caulk:
Our Recommended Caulk
[amazon box=”B0146L6J8U,B00HNDHEKG,B000BQSXSE,B00IGHDNNK,B07PQSZ5YH” template=”table”]Tape The Surfaces
After choosing the caulk and getting it home, it’s time to mark the area for work with some blue painter’s tape. Apply strips of the tape to the points you want the edges of the caulk to stop.
Use long pieces of the tape, rather than the short pieces, keeping the tape straight. The goal is to seal the inner edges, so the caulk doesn’t seep in. So, press firmly. Also, make sure to use a good quality painter’s tape.
Apply The Caulk
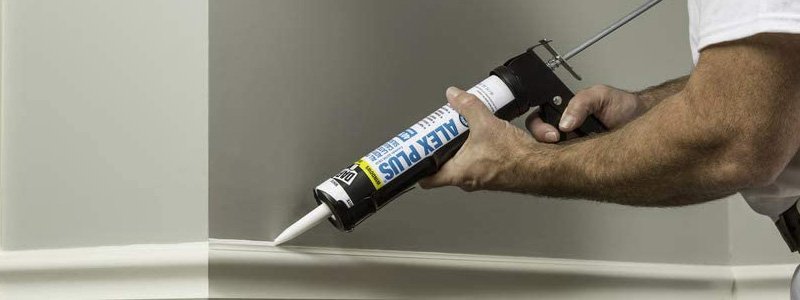
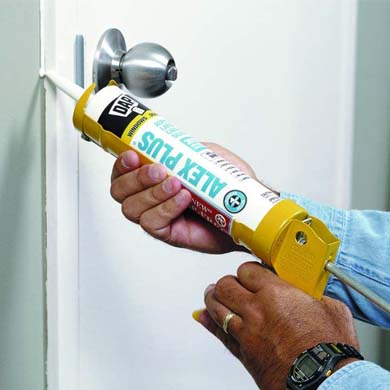
Now, it’s time to apply the caulk. Open the caulk tube by making a 45-degree cut at the edge using a utility knife. Fill the caulk gun in.
Now, apply the caulk, holding the gun at 45 degrees with a slow and consistent speed. Once that is done, take the corner of a cloth rag, dampen it in some rubbing alcohol, or water and smoothen the caulk. Use light pressure.
Once the smoothening is done, immediately remove the blue painter’s tape. Now let the caulk cure.
That’s it. You have finished the job. A couple of days spent productively. Now, let us answer some questions you might have.
FAQs
Which caulk should I use for a tub?
You can try using silicone caulk. But there are some acrylic latex caulks in the market with silicone additives that can work as an alternative.
Are silicone caulks germ-free?
Not all of them. But you’ll find antigerm silicon caulks available in the market.
Final Words
We’ve reached the end of our answer to your question “How Soon After Painting Can You Caulk?”. We hope it was helpful.
So, how about you give us some feedback? Here’s a couple of questions for you:
Did we miss something?
What kind of caulk did you use?
Is there something else you want us to cover?
Let us know in the comments below.
Leave a Reply